What can you do with Gmail?
With Gmail, your email is stored safely in the cloud. This means you can get to them from any computer or device with a web browser. You can also quickly organize and find important email, as well as read and draft email without an internet connection.
What you need:
account_circle G Suite account
schedule 10 minutes
Switching from a different mail program?
Learn more from these guides: Switching to Gmail from Microsoft Outlook® or Switching to Gmail from IBM Notes®.
Note: If your G Suite administrator hasn’t already migrated your old mail for you, you may want to import your old mail before starting this tutorial.
Open Gmail:
- Go to mail.google.com from any web browser.
- Install the Gmail app for Android.
- Install the Gmail app for Apple® iPhone® or iPad®.

Create and send email
Learn the basics of creating, sending, viewing, and replying to email.
In this section, you learn how to:
Create and send email
- Open your Gmail inbox.
- In the left sidebar, click
.
A new email opens.
- (Optional) Change your window using the buttons in the upper corner.
- Add recipients and a subject.
- Enter your message.
Email you start writing but haven’t sent are automatically saved in Drafts on the left sidebar.
- (Optional) Add attachments attach_file, links link, images image, and more.
- Click .
Tip: To unsend an email, at the bottom of the window, click Undo. This option appears briefly, but you can change how long it lasts. See Undo sending your mail.

Minimize

Maximize
Exit the screen
Shift +
Pop-out and resize
Exit full screen
See new email
Unread email are bold. To open an email, click it.
By default, replies to email are grouped into conversations. Keeping all email together in a thread makes it easier to keep track of them and saves space in your inbox.
If you prefer to separate your existing email from future email, you can turn off conversation view.
Turn off conversation view:
- In the top right, click Settings settings > Settings.
- In the General tab, scroll to Conversation View and select Conversation view off.
- At the bottom, click .
Tip: To get more space for your email, you can close the left panel by clicking Menu menu.

Reply to email
- To reply to a single email or the last email in a thread, click .
- To reply to an email within a thread, click Reply reply.
- To forward a single email or the last email in a thread, click .
- To forward an email within a thread, click More more_vert > Forward.
- To see previous email in a thread, click Show trimmed content
.
- To forward an entire conversation, at the top, click More more_vert > Forward all.
- To use a Smart Reply, at the bottom of the email, click a suggested reply. You can then edit the email before sending it.
Tip: You might see existing email at the top of your inbox with a suggestion to reply or follow up. To hide these suggestions, click Settings settings > Settings, go to Nudges and uncheck the boxes.

Change recipients
Add and remove recipients:
- From an open email, click a recipient’s address.
- To add more recipients, type their email addresses.
- To remove recipients, next to their email address, click Remove close.
Change an email subject:
- Next to Type of response reply, click the Down arrow arrow_drop_down > Edit subject.
- Type a new subject.

Save and print attachments
When someone sends you an attachment, such as a photo or document, you see a preview of the attachment in the email.
- See a full-screen view and print: Click the attachment to open a full-screen view. To print, click Print print.
- Download an image or save it to Drive: Point to the preview and click Download file_download or Save to Drive drive_file_stream.
Learn more about Gmail attachments.

Email without an internet connection
Use Gmail offline to read, respond to, and search your Gmail messages when you aren't connected to the internet. Any email you write, archive, label, or delete while you're offline will be sent or moved when you’re back online.
When you enable Gmail offline on a device, your messages will sync with the browser's storage on the computer you're using. You need to enable Gmail offline on each device for which you want offline access.
Enable Gmail offline:
- In the top right, click Settings settings and select Settings.
- Go to the Offline tab and check the Enable offline mail box.
- Next to Sync settings, choose how many days of email you want to store offline.
- Next to Security, choose whether to keep or remove offline data on your device. If you don’t see this option, it might be set by your G Suite administrator.
- Click Save Changes.
Note: If you don't see the Offline option, it might not be enabled for your organization. See your G Suite admin.

Organize your inbox
Manage email with labels and filters and move email out of your inbox.
In this section, you learn how to:
Switch to labels from folders
In other email programs, you might have stored email in folders. In Gmail, you use labels to categorize your email. Labels are like folders, but with a twist—you can apply several labels to an email, then later find the email by clicking any of its labels from the left panel.
You can also:
- Open a label in the left sidebar to see all email with that label.
- Nest labels within labels.
- Search for all email with a label.
- Set up your inbox as you prefer:
- See labels on email in your inbox to quickly identify different types of email.
- Auto-archive email to route it away from your inbox, as you did with rules and folders.
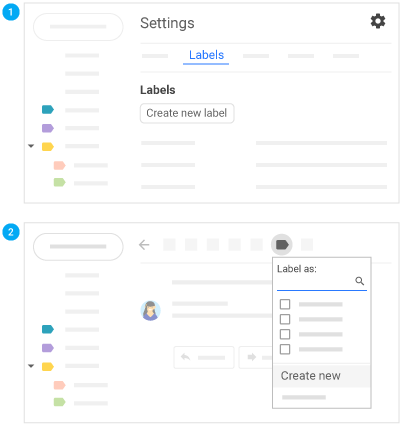
Create labels
-
Create a label:
- In the top right, click Settings settings and select Settings.
- Click the Labels tab.
- Scroll to the Labels section and click Create new label.
- Enter the label name and click .
You can also create nested labels, which are like subfolders.
-
Create a label from an email:
- From an email, click Labels label > Create new.
- Enter the label name and click .
- (Optional) Click Nest label under and choose
an existing label to place it under.
The new label automatically applies to your email.
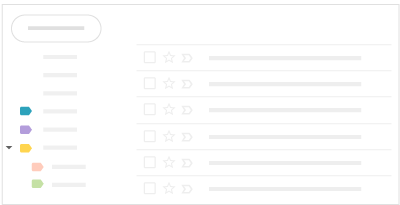
Apply labels
-
Apply labels to email:
- In your inbox, check the boxes next to the email you want to apply a label to.
- Click Labels label.
- Check the boxes next to the labels you want to add and click Apply.
-
Add a color to a label:
- In the left panel, point to a label and click More more_vert.
- Point to Label color and choose a color. Or,
click Add custom color.
The change instantly applies to all email with that label.
- (Optional) To remove a label color, point to Label color and click Remove color.
- (Optional) To see all email with a particular label, in the left panel, click the label’s name.
-
Move email from your inbox to a label:
Move email out of your inbox to labels the same way you did with folders.
- In your inbox, check the boxes next to the email you want to move into a label.
- Click Move to drive_file_move.
- Click the label you want to move your email to.

Add filters
Manage your incoming email automatically with Gmail’s filters.
- In the Gmail search box, click the Down arrow arrow_drop_down.
- Enter your search criteria, then click Create filter.
- Check the Apply the label box and choose a label to automatically sort incoming email fitting your search criteria.
- (Optional) If you’d like email fitting your search criteria to be automatically moved out of your inbox, but want to be able to access them later, check Skip the Inbox (Archive it).
- Click .

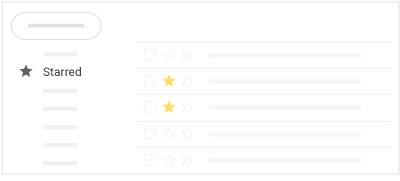
Star important email
Want to flag an important email? Click Star star_border next to an email in your inbox or an email within a conversation.
To see all your starred email, in the left sidebar, click Starred.
Snooze email
Postpone email to a future date or time that's more convenient for you.
- Point to an email.
- On the right, click Snooze watch_later.
- Under Snooze until, choose a time.
The email automatically snoozes and moves out of your inbox.
- (Optional) To see all snoozed email, click Snoozed in the left sidebar.

Archive or delete email
Archived email move out of your inbox but stay under All mail, so that you can find them later. Deleted email move to the Trash and get permanently deleted after 30 days.
To archive or delete email, select one or more email. At the top, click Archive archive or Delete delete. Or, you can point to a single email and click Archive archive or Delete delete.

Find email
Search your inbox to find the email you need.
In this section, you learn how to:
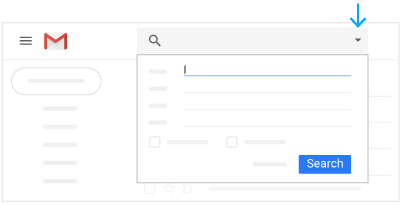
Search your inbox
To search for keywords, type the word you’re looking for into the search box. Gmail suggests search terms as you type. Click a suggestion or click Search search.

Narrow your search
To narrow your search, at the right of the Gmail search box, click the Down arrow arrow_drop_down.
Add specific search criteria. For example, you can find an email from Alice that has an attachment within a particular time frame.
Create signatures
Automatically add a professional email signature to email you send.
In this section, you learn how to:
Create a signature
Your signature can include your name, title, and contact information.
- Click Settings settings and select Settings.
- On the General tab, scroll down to the Signature section and create your signature.
- (Optional) Use the format bar to add text colors, styles, links, or a picture.
- At the bottom, click .
To create multiple signatures, see Create multiple signatures using canned responses.

Access your calendar, notes, and tasks
See your schedule, reply to invitations, and keep track of your to-do lists without leaving Gmail.
Note: If you don’t see the Calendar, Keep, and Tasks icons on the right, they might not be enabled for your organization. Talk to your G Suite admin.
In this section, you learn how to:
Open your Google Calendar and events
-
Open Calendar: On the right, click Calendar
.
Your daily events and a mini monthly calendar appear.
- See event details: Click an event to open it and see details.
- Reply to an event: Open an event. At the bottom, next to Going?, click a reply.
To do more with Calendar, see Get started with Calendar.

Open notes in Google Keep
-
Open Keep: On the right, click Keep .
- Add a note or list: Click + Take a note or New list format_list_bulleted.
- Edit a note: Click a note and enter a message. Click Done.
To do more with Keep, see Get started with Keep.

Open your to-do lists in Google Tasks
-
Open Tasks: On the right, click Tasks .
The current list appears at the top, with any tasks below it.
- Add a new list: Click the Down arrow arrow_drop_down > Create a new list.
- Change lists: Click the Down arrow arrow_drop_down and select a list.
- Add a new task: Click + Add a task. To add a new task from an email, drag the email into a task list.
- Edit or delete a task: Point to a task and click Edit create. From the Edit window, click Delete delete to delete a task.
To do more with Tasks, see Keep track of tasks.
